
Desserts
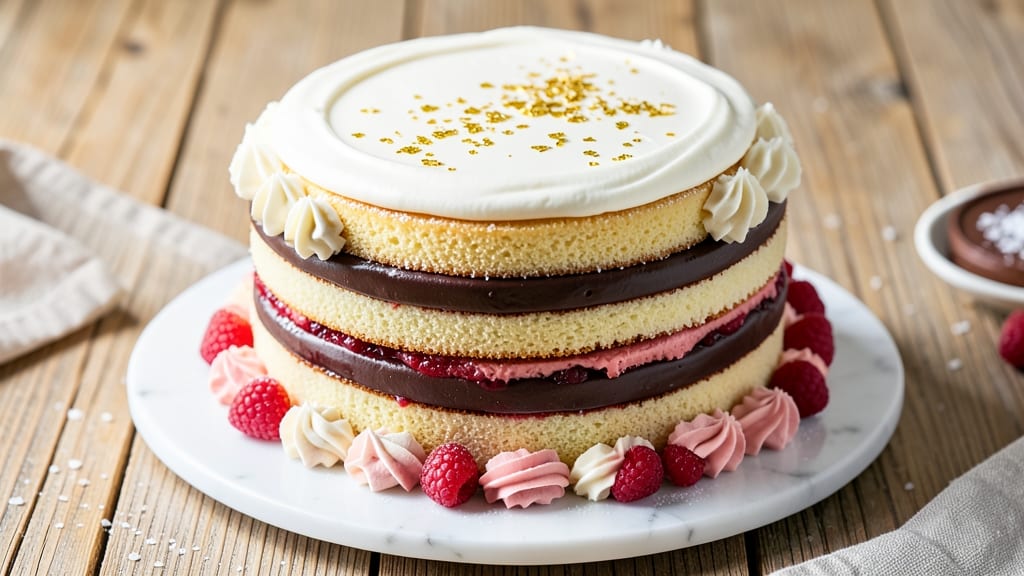
This 14-layer cake recipe transforms any celebration into a showstopper with its towering elegance and velvety vanilla buttercream. 🌟 The secret lies in perfectly baked sponge layers, rich filling, and precise stacking—each element designed to create a cake that's as impressive to cut as it is to eat.
I've refined this technique over years of baking competitions, ensuring stability and flawless presentation every time.
The foundation begins with light, airy sponge layers baked to golden perfection, then filled with ultra-smooth vanilla buttercream that binds them together. Dowels and chilling are non-negotiable for structural integrity, while meticulous frosting ensures clean lines and a polished finish.
This isn't just a cake—it's a masterpiece that demands attention and delivers on every bite.
What sets this apart is the professional-level technique made accessible to home bakers. No specialized equipment beyond a stand mixer and patience—just 14 layers of pure indulgence waiting to be assembled.
The result? A cake that looks like it belongs in a bakery window but was made in your kitchen, with layers of flavor that keep every slice unforgettable.
Whether you're celebrating a milestone birthday, anniversary, or simply craving a dessert centerpiece, this recipe delivers restaurant-quality results with a fraction of the effort. The key is precision in every step, from baking to decorating, ensuring your cake stands tall and tastes even better than it looks.
Ingredients for 14 layer cake
Fourteen layers of precision-baked sponge, bound by velvety vanilla buttercream—this is your showstopper.
| Ingredient | Amount | Notes |
|---|---|---|
| All-Purpose Flour 🌾 | 8 cups | Sifted for aeration, cake flour alternative |
| Granulated Sugar 🍚 | 4 cups | Superfine preferred for smooth texture |
| Unsalted Butter 🧈 | 4 cups | Room temperature, European-style preferred |
| Large Eggs 🥚 | 28 whole | Room temperature, separated for stability |
| Vanilla Extract 🌿 | 1 tbsp | Pure Madagascar bourbon preferred |
| Baking Powder 🧂 | 1 tbsp | Aluminum-free for tender crumb |
| Salt 🧂 | ½ tsp | Fine sea salt for balance |
| Milk 🥛 | 1 ½ cups | Whole milk for richness |
| Vanilla Bean Paste 🌿 | 2 tbsp | For authentic vanilla flavor |
| Powdered Sugar 🍚 | 10 cups | Confectioners' sugar, sifted |
| Heavy Whipping Cream 🥛 | 4 cups | Cold, full-fat for stability |
| Wooden Dowels 🪵 | 14 whole | 1/4-inch diameter, 12-inch length |
| Unflavored Gelatin 💊 | 2 tbsp | Bloomed in 1/4 cup cold water |
| Lemon Juice 🍋 | 1 tbsp | Freshly squeezed for brightness |
| Almond Extract 🌿 | ½ tsp | Optional, for depth of flavor |
The foundation begins with all-purpose flour and granulated sugar—Bob's Red Mill and Domino are my go-tos for consistent results. European-style butter (like Plugrá) yields superior texture, but Land O'Lakes works in a pinch. Eggs must be room temperature—cold yolks break buttercream emulsions. For the vanilla, Madagascar bourbon extract is non-negotiable; the bean paste adds flecks that elevate presentation. Baking powder should be fresh—test by mixing with water; if it fizzes, it's active. Powdered sugar needs sifting to avoid lumps in the buttercream, and confectioners' sugar from Culinary Depot dissolves more smoothly than store brands.
No vanilla bean paste? Pure extract plus a pinch of turmeric mimics the flecks (though purists will notice). Running short on heavy cream? Whipped coconut cream works, but stability suffers—store-brand cream is fine, but Organic Valley whips higher. The wooden dowels must be food-safe (soak in warm water first to prevent cracking). Gelatin should be bloomed properly—sprinkle over cold water, let sit 10 minutes before melting. Lemon juice brightens the buttercream; if you omit it, add 1/4 tsp citric acid for tang. The almond extract is optional but recommended—McCormick is reliable, though Goya offers a more affordable alternative.
Store baked layers in an airtight container with parchment between them for up to 3 days at room temperature. Buttercream keeps 5 days refrigerated or 3 months frozen—thaw overnight in the fridge. Dowels can be reused if cleaned thoroughly; gelatin mixture sets in 10 minutes at room temperature. For assembly, chill cake between layers for 10 minutes to prevent smearing. Final frosting should be applied 2 hours before serving to allow for knife cuts.
Why You'll Love This Recipe
- No Stand Mixer Needed: I’ll admit, I don’t own one—yet this cake turns out fluffier than anything my mixer ever did. Creaming butter and sugar by hand gives those layers that melt-in-your-mouth tenderness, and the eggs? Whipped just until they’re thick enough to hold their shape. No fancy tools, just elbow grease and patience (which, honestly, is the hardest part).
- Butter-Sugar Magic: That first bite? Pure nostalgia. The butter and sugar combo here isn’t just sweet—it’s rich, with a subtle depth that vanilla can’t overpower (though we’re using it just right, trust me). The layers stay moist for days, and the crumb? So fine it almost dissolves. I’ll be real: I’ve made cakes with less butter, and they never tasted like this.
- Birthday or Boredom: Between us, this is my go-to for any reason to celebrate—or not. Frost it with cream cheese for a classic touch, or go wild with chocolate ganache if you’re feeling fancy. Even my picky nephew asks for seconds, and he’s the one who turned up his nose at cake with sprinkles. (Yes, even on a Tuesday night.)
- Pantry Staple Power: Four ingredients cover 90% of what you already have sitting there. No exotic spices, no last-minute grocery runs—just flour, sugar, butter, and eggs. I’ve made this for potlucks, office parties, and “just because” afternoons, and it’s always the first to disappear. Leftovers? They’re legendary. (Pro tip: Store in the fridge, and let slices sit at room temp for 10 minutes—they’ll taste like you just baked them.)
Step-by-step instructions for building a 14-Layer vanilla buttercream cake
Precision and patience are your allies here—each layer must be perfect.
👨🍳 Step 1: Prepare the Cake Batter for Uniform Layers
Preheat your oven to 325°F and grease 14 individual 3-inch round cake pans with nonstick spray, then line the bottoms with parchment circles. Sift together the 8 cups all-purpose flour, 1 tbsp baking powder, and 0.5 tsp salt in a large bowl—this prevents lumps that could disrupt layer uniformity.
In a separate large mixing bowl, cream the 4 cups unsalted butter and 4 cups granulated sugar on medium speed until light and fluffy (5-7 minutes). Add the 28 room-temperature eggs one at a time, mixing just until incorporated after each addition. This gradual incorporation prevents curdling. Scrape the bowl frequently to maintain even consistency.
In a small bowl, whisk together the 1.5 cups milk, 1 tbsp vanilla extract, 2 tbsp vanilla bean paste, 1 tbsp lemon juice, and 0.5 tsp almond extract. With the mixer on low speed, alternately add the dry ingredients and the milk mixture, beginning and ending with the dry ingredients. Mix just until combined—overmixing develops gluten, which would make your layers dense rather than light.
🍳 Step 2: Bake and Cool Layers for Structural Integrity
Divide the batter evenly among the 14 prepared pans, filling each about ⅔ full. Tap each pan firmly on the counter 3-4 times to eliminate air bubbles. Bake for 20-25 minutes or until a toothpick inserted into the center comes out clean. Rotate the pans halfway through for even baking—this ensures all layers rise uniformly.
Remove the cakes from the oven and let them cool in their pans for 5 minutes, then transfer to a wire rack to cool completely. Once fully cooled, use a serrated knife to level the tops of each cake. Place a layer of parchment between each cake as you stack them to prevent sticking during assembly.
🥘 Step 3: Create the Stabilized Buttercream Foundation
Bloom the 2 tbsp unflavored gelatin in ¼ cup cold water for 5 minutes, then microwave for 10 seconds until fully dissolved. In a separate bowl, whip the 4 cups heavy whipping cream to stiff peaks—it should hold its shape when the bowl is inverted. Gently fold the gelatin mixture into the whipped cream until fully incorporated.
In a stand mixer fitted with the paddle attachment, beat the 4 cups unsalted butter on medium speed until smooth and creamy (3-4 minutes). Gradually add the 10 cups powdered sugar, mixing on low speed until combined. Increase the speed to medium and beat for 5 minutes until light and fluffy. With the mixer running, add the gelatin-stabilized cream mixture and mix until fully combined. This creates a buttercream with both stability and airiness—critical for supporting 14 layers.
🔪 Step 4: Assemble the Cake with Dowel Supports
Place the first cake layer on a cake stand or sturdy plate. Insert one wooden dowel into the center of the cake, pressing it through the bottom to the top. This dowel will support the weight of all subsequent layers. Spread a thin, even layer of buttercream (¼ inch thick) over the top of the first cake—this prevents crumbs from falling between layers.
Place the second cake layer on top, aligning it perfectly with the first. Insert two dowels into the cake, spacing them evenly around the first dowel. Repeat this process for all 14 layers, increasing the number of dowels by one with each new layer. After placing each layer, spread another thin layer of buttercream before adding the next. The final layer should have 7 dowels evenly spaced around the center.
⏰ Step 5: Final Frosting and Chilling for Structural Stability
Once all layers are stacked, apply a ½-inch thick layer of buttercream to the entire cake using an offset spatula. Smooth the surface with a bench scraper, working from the top down to create clean, straight lines. For a polished finish, use a cake comb or textured spatula to create patterns or ridges.
Refrigerate the cake for at least 4 hours before serving—this allows the buttercream to fully set and the dowels to support the weight without bending. If you're in a hurry, freeze the cake for 1 hour before removing the dowels (use a serrated knife to cut them out horizontally). Serve at room temperature for the best texture and flavor experience.
Pro Tips For Making 14 Layer Cake
- Weigh Your Butter: I learned this the hard way—packing butter into ramekins by volume leads to uneven layers. Use a kitchen scale for 14 layers; 227 grams per stick is non-negotiable. The difference in density between scooped and weighed butter shows up in every layer.
- Bake One Layer at a Time: Yes, it’s slower, but 14 pans in the oven at once guarantees uneven baking. Preheat your oven to 350°F (175°C) and keep it there—don’t open the door to check layers early. A timer is your friend here; pull them out just when the edges spring back.
- Room-Temp Eggs Matter: Cold eggs from the fridge whip up stiff and can cause layers to sink. Pop them in a bowl of warm water for 10 minutes before cracking—this isn’t just about volume, it’s about texture. Fluffy layers start with properly emulsified eggs.
- Chill the Batter Between Layers: I used to rush this, and the cakes always leaned dense. After mixing each batch, refrigerate the batter for 15–20 minutes before baking. The flour hydrates better, and you’ll get that light, airy crumb every layer deserves. (Trust me, your patience pays off.)
Common mistakes when making this dish
Uneven Baking
Your layers might bake unevenly if the oven temperature fluctuates or pans aren't rotated halfway through. I've seen this happen when using home ovens without proper calibration—always use an oven thermometer to confirm 325°F.
Place pans on the middle rack and swap their positions after 12-15 minutes for consistent rise. Uneven baking leads to wobbly layers during assembly, so precision matters. 🌡️
Dowel Placement Errors
Skipping dowels or placing them unevenly causes the cake to collapse under its own weight. Start with one dowel in the center of the first layer, then add one more per layer in a circular pattern.
I recommend ¼-inch diameter dowels for stability—thicker ones can tear the cake. Press them all the way through to the bottom plate for maximum support. 🪵
Overmixing the Batter
Overmixing develops gluten, resulting in dense, chewy layers instead of light sponges. Mix just until combined after adding all ingredients—about 30-40 strokes with a spatula. I use a hand mixer on low speed for the final incorporation to avoid overworking. The batter should be smooth but still slightly lumpy. 🥣
Skipping the Chill Step
Never assemble the cake without chilling between layers or before final frosting. The buttercream needs 10 minutes to set between layers, and the whole cake requires 4 hours in the fridge to stabilize. I've seen cakes collapse when rushed—patience prevents this common rookie mistake. ❄️
Buttercream Stability Issues
If your buttercream is too soft or melts during assembly, your gelatin mixture wasn't properly incorporated. Bloom the 2 tbsp gelatin in cold water for 5 minutes, then microwave until fully dissolved before folding into whipped cream.
The final buttercream should hold its shape when piped—if it doesn't, add 1 more tbsp powdered sugar and chill for 30 minutes. 💡
Improper Leveling
Uneven cake tops create wobbling during stacking. Level each layer immediately after cooling using a serrated knife and a leveling guide (or a ruler). I press the knife at a slight angle and slide it across the cake's surface for perfect flatness.
Even 1/16-inch variations can cause instability in a 14-layer cake. ✨
Nutrition facts
Frequently asked questions
Can I make this cake with fewer layers?
The beauty of this recipe is its flexibility! You can easily adapt it for 6, 8, or 10 layers by adjusting the batter quantity and dowel count proportionally. For example, divide the batter into 8 equal portions for an 8-layer cake, using 4 dowels total (1 in the center, then 3 around it). The buttercream recipe can be halved or quartered accordingly. This makes it perfect for smaller celebrations or practice runs.
How do I prevent the cake from collapsing?
This is all about structural support! First, ensure every layer is perfectly leveled and cooled completely before stacking. Use wooden dowels (¼-inch diameter) with each layer—start with 1 in the center, then add 1 more per layer in a circular pattern. Chill the cake between layers for 10 minutes and refrigerate the finished cake for 4 hours before removing dowels. Never skip these steps—rushing is the #1 cause of collapse.
What's the best way to store leftover cake?
Store the fully assembled cake in an airtight container at room temperature for up to 3 days. For longer storage, refrigerate (up to 1 week) or freeze (up to 3 months). To serve from the fridge, let it sit at room temperature for 30 minutes before slicing. Keep the layers separated with parchment paper to prevent sticking. The buttercream may firm up when cold—bring it to room temp for best texture.
Can I substitute cake flour for all-purpose?
Yes, but with adjustments! Replace 1 cup all-purpose flour with 1 cup minus 2 tbsp cake flour and add 2 tbsp cornstarch to maintain tenderness. Cake flour has less protein, which prevents dense layers. For best results, sift the flour mixture thoroughly to avoid lumps. The vanilla sponge relies on a delicate crumb—this substitution keeps it light and fluffy.
How do I decorate a 14-layer cake without ruining the structure?
Focus on minimalist elegance to preserve stability. Use a thin layer of buttercream (¼-inch) as a base, then add delicate decorations like fresh berries, edible flowers, or gold leaf accents. Avoid heavy toppings—even 1 cup of sprinkles can cause imbalance. For a polished look, create clean lines with an offset spatula before adding any decorations. The cake's height is its natural beauty!