
Desserts
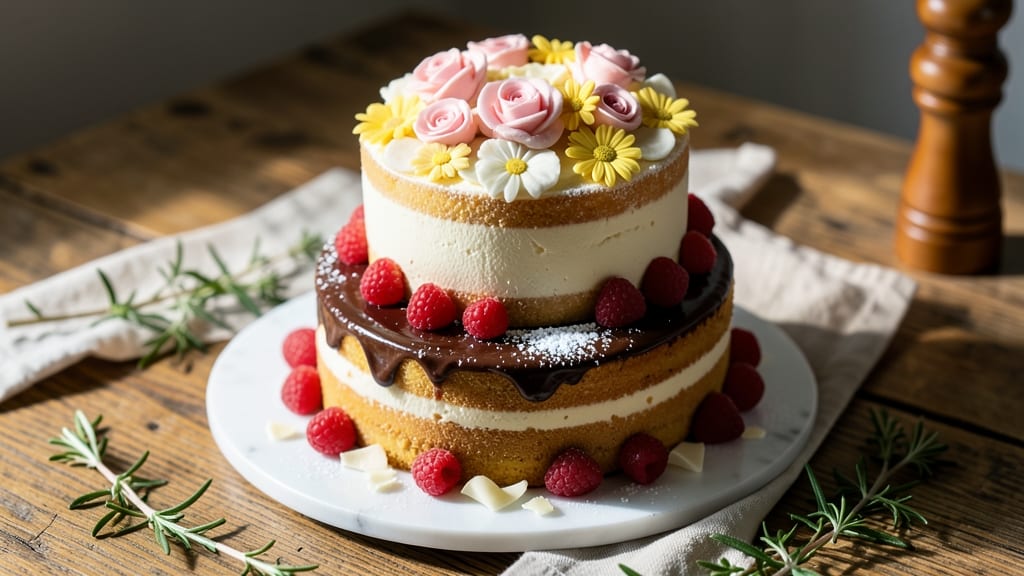
This 2nd birthday cake recipe transforms a simple vanilla sponge into a showstopper with playful characters and velvety buttercream. 🎉 The secret lies in a foolproof vanilla cake base that bakes perfectly every time, topped with bright, edible decorations that toddlers will adore.
I designed this recipe after realizing how hard it is to find a cake that’s both delicious and visually engaging for little ones—this one checks both boxes effortlessly.
The cake itself is light and tender, thanks to a simple mix of flour, sugar, and eggs that creates the ideal foundation for buttercream. The real magic happens with the frosting—a smooth, vanilla-scented buttercream that’s easy to pipe and decorate.
Whether you’re piping simple rosettes or creating whimsical character shapes, this frosting holds its form beautifully while staying creamy enough to spread. The recipe includes step-by-step guidance for baking, cooling, and decorating, so even baking novices can achieve professional-looking results.
What sets this cake apart is the focus on fun, toddler-friendly designs—think bright colors, simple shapes, and characters that spark joy. The vanilla flavor ensures it’s a hit with picky eaters, while the buttercream’s sweetness keeps little ones happy.
Parents will love how easy it is to customize the decorations to match the birthday theme, from animals to balloons. The cake stays moist for days, making it perfect for celebrations where timing is everything.
Ready to create a cake that’s as delicious as it is adorable? This recipe delivers a foolproof vanilla cake, smooth buttercream, and easy decoration techniques that make every slice a celebration. Let’s get baking!
Ingredients for 2nd birthday cake
Twelve simple ingredients create a magical vanilla cake perfect for little ones' celebrations.
| Ingredient | Amount | Notes |
|---|---|---|
| All-Purpose Flour 🌾 | 2 ½ cups | Sifted for light texture |
| Granulated Sugar 🍚 | 2 cups | Superfine preferred for smoothness |
| Unsalted Butter 🧈 | 1 cup | Room temperature, full-fat |
| Large Eggs 🥚 | 4 whole | Room temperature for even baking |
| Pure Vanilla Extract 🌿 | 2 tsp | High-quality Madagascar bourbon |
| Baking Powder 🍞 | 2 tsp | Aluminum-free preferred |
| Salt 🧂 | ½ tsp | Fine sea salt |
| Milk 🥛 | 1 cup | Whole milk for richness |
| Powdered Sugar 🍚 | 4 cups | Confectioners' sugar, sifted |
| Vanilla Bean Paste 🌿 | 1 tbsp | For intense vanilla flavor |
| Heavy Whipping Cream 🥛 | 1 cup | Cold, full-fat for stability |
| Edible Food Coloring 🎨 | 1 tsp | Bright colors for decorations |
| Piping Gel 🎨 | ½ tsp | Optional for vibrant colors |
| Springform Pan 🍰 | 1 piece | 8-inch diameter |
| Parchment Paper 📄 | 1 sheet | For easy removal |
The vanilla extract and bean paste make all the difference here—look for Madagascar bourbon vanilla at specialty stores like Williams Sonoma or Sur La Table for that authentic flavor. Freshly sifted flour and powdered sugar are non-negotiable; Bob's Red Mill has great quality options. For the butter, Plugrá or Land O'Lakes are reliable brands. The milk should be whole—none of that skim nonsense when we're making something this indulgent. If you're worried about the cake being too dry, add an extra tablespoon of milk—it's a lifesaver for this recipe.
No vanilla bean paste? Double the vanilla extract—trust me, it works. Running short on powdered sugar? Blend granulated sugar in a blender for 30 seconds—it's not ideal but it'll do in a pinch. For the food coloring, Wilton or Americolor are the gold standards, but anything from the craft store works too. The piping gel is optional but worth it for vibrant colors—it intensifies the hues without thinning the frosting. If you don't have one, gelatin or even clear fruit juice can work in a bind. And for the love of cake, don't skip sifting the flour and powdered sugar—it makes a world of difference in texture.
This cake keeps beautifully—covered at room temperature for 2 days or in the fridge for 5 days. The buttercream stays fresh too, though it's best used within 3 days of making the cake. I like to prep the cake layers a day ahead and decorate the morning of—less stress, more fun. Store leftovers in an airtight container with parchment between layers to keep them moist. The decorations? Use them within 24 hours for best color vibrancy—kids won't care, but you will.
Why You'll Love This Recipe
- No Mixer Needed: I swear by this recipe when I’m in a rush—just cream the butter and sugar by hand (or use a fork in a pinch). The eggs and vanilla blend right in without any fuss, and the flour comes together like a dream.
- Buttery-Vanilla Magic: That rich butter-and-sugar combo? It’s pure nostalgia in every bite. The vanilla extract doesn’t just add flavor—it makes the whole cake smell like a bakery, even if I’m baking it in my tiny kitchen.
- Double-Duty Cake: Here’s what sold me—this recipe works for a birthday and a casual dessert. Slice it for a toddler’s party, or save half for a snack later. (Yes, even on a Tuesday night.)
- Budget-Friendly Staples: Flour, sugar, butter—these are the basics I always have. No fancy ingredients, no wasted leftovers (unless someone asks for seconds, which they always do). It’s the kind of cake that costs less than takeout but feels like a treat.
Step-by-step instructions for whimsical vanilla birthday cake
Here's how to bake a tender vanilla cake that's perfect for decorating with playful characters.
👨🍳 Step 1: Prepare the Cake Batter
Preheat your oven to 350°F and grease the 8-inch springform pan with butter, then line the bottom with the parchment paper. Sift together the 2.5 cups all-purpose flour, 2 tsp baking powder, and 0.5 tsp salt in a medium bowl. Set aside - we'll need this dry mix later.
In a large mixing bowl, cream together the 1 cup room-temperature unsalted butter and 2 cups granulated sugar on medium speed until light and fluffy - about 3-4 minutes. This step is crucial for that tender crumb. Add the 4 whole large eggs, one at a time, mixing well after each addition. Scrape down the sides of the bowl to ensure everything's incorporated.
In a separate small bowl, whisk together the 1 cup milk, 2 tsp pure vanilla extract, and 1 tbsp vanilla bean paste. This combination gives that signature vanilla depth. With the mixer on low speed, gradually add about one-third of the flour mixture, then half of the milk mixture, mixing just until combined. Repeat, ending with the remaining flour mixture. Mix on low speed just until the batter is smooth - overmixing develops gluten and makes the cake tough.
🔥 Step 2: Bake the Cake Layers
Divide the batter evenly between the prepared springform pan (you'll have two layers). Tap the pan gently on the counter to remove any air bubbles. Bake for 25-30 minutes or until a toothpick inserted in the center comes out clean. The edges should be golden brown while the top still looks slightly domed.
I like to rotate the pan halfway through baking for even browning. When done, remove from the oven and let the cakes cool in the pan for 10 minutes before transferring to a wire rack to cool completely. This gradual cooling prevents cracking. While they cool, prepare your decorating ideas - this cake is a blank canvas for birthday fun!
🥘 Step 3: Make the Vanilla Buttercream
In a large mixing bowl, beat the 1 cup cold heavy whipping cream with an electric mixer until soft peaks form. In a separate bowl, whisk together the 4 cups powdered sugar, 1 tbsp vanilla bean paste, and a pinch of salt. Gradually add the powdered sugar mixture to the whipped cream while mixing on low speed.
Increase the speed to medium and beat until smooth and fluffy - about 2-3 minutes. For vibrant decorations, divide the buttercream into three bowls and tint each with 1 tsp edible food coloring and 0.5 tsp piping gel (if using) for bright, stable colors. This buttercream is perfect for piping whimsical characters or creating colorful borders that will make this cake truly magical for a second birthday.
🎨 Step 4: Assemble and Decorate
Once the cakes are completely cool, level the tops if needed. Place one layer on a cake stand or plate and spread a thin layer of buttercream on top. Place the second layer on top and spread buttercream over the entire cake, creating a smooth base for your decorations. Chill the cake in the refrigerator for 15 minutes to firm up the buttercream slightly - this makes piping easier.
Now for the fun part! Use your tinted buttercream to pipe characters, flowers, or birthday-themed decorations onto the cake. For extra stability, pipe a thin base layer first, then add your designs. Let the decorations set for 10 minutes before serving. This cake is perfect for capturing those adorable second birthday moments with edible art that's as fun to create as it is to eat!
Pro Tips For Making 2nd Birthday Cake
- CREAM BUTTER FIRST: Mix the butter and sugar until it’s pale and almost fluffy—about 3-4 minutes with a stand mixer or until the bowl feels warm to the touch. I learned this the hard way: skipping this step means your cake will taste flat, no matter how much vanilla you add.
- WEIGH YOUR FLOUR: Scoop the flour directly from the bag into a measuring cup, then level it off with a knife—don’t pack it down. After burning three batches with dense, dry cake, I finally realized the recipe expects light, airy flour, not a brick.
- DON’T OVERMIX: Stop folding in the flour the second it disappears—about 10-12 strokes with a spatula. Overmixing develops gluten, and your cake will turn out tough instead of tender. (Yes, even if you’re impatient like me.)
- USE ROOM-TEMP EGGY: Let eggs sit out for 30 minutes before cracking them into the batter. Cold eggs can cause the butter to seize up and make the texture uneven. I was skeptical until I tried it—now it’s non-negotiable for this recipe.
Serving suggestions for leftovers
Character Cake Ideas
Turn your cake into a toddler’s dream with simple character designs! Use a Wilton 1M tip to pipe balloon animals or cartoon faces in bright colors. I love making smiley faces with chocolate eyes or rainbow balloons using the tinted buttercream.
For extra flair, add edible glitter or sprinkles to the frosting before piping. 🎨
Themed Cake Stands
Elevate your presentation with a themed cake stand. A wooden train stand works perfectly for a "choo-choo" birthday, while a pastel unicorn stand adds magic for fantasy lovers. I found cute options at Michaels in the party section—just wipe them down before use.
For a DIY touch, paint a plain cake board with acrylic paint and let it dry completely before decorating.
Fruit Toppers
Skip the frosting decorations and go fresh! Arrange strawberries, blueberries, and banana slices into animals or flowers on top. A banana slice smiley face or strawberry heart adds color and a healthy touch.
Arrange toppings right before serving so they stay vibrant. This is a great option if you’re short on time or want to avoid mess. 🍓
Interactive Decorations
Make the cake a playful experience with interactive elements. Pipe small buttercream "candles" and let kids blow them out (edible and fun!). Or create a "build-your-own cake" station with mini cupcakes, sprinkles, and frosting on the side.
I’ve seen parents use clear plastic cups as mini frosting dispensers for little hands—genius! Just supervise closely.
Seasonal Touches
Adjust decorations for the season! For spring, pipe butterfly wings or flower bouquets. In winter, add snowflake cutouts or mini marshmallow "snow" on top.
I love using food-safe paint pens to draw holiday-themed designs directly on the cake. Check the weather and pick decorations that match the birthday vibe. ❄️
Serving Essentials
Don’t forget the serving details! Use a large cake knife with a serrated edge for clean slices. Place the cake on a tray lined with parchment paper for easy cleanup.
Serve with mini vanilla ice cream scoops or whipped cream on the side. For a mess-free option, offer cake pops made from leftover frosting—kids love them! 🎉
Nutrition facts
Frequently asked questions
Can I make this cake without a springform pan?
Yes! Use two 8-inch round cake pans instead. Grease them well and line the bottoms with parchment paper. Bake for 25-30 minutes at 350°F until a toothpick comes out clean. Let the cakes cool completely before removing from the pans and assembling. This method works just as well for layering and decorating.
How do I store leftovers without drying out the cake?
Wrap each layer tightly in plastic wrap, then place them in an airtight container with parchment paper between the layers. Store at room temperature for up to 2 days or refrigerate for 5 days. For the buttercream, keep it in a sealed container in the fridge and re-whip briefly before using. Reheat slices in the microwave for 10-15 seconds to restore moisture.
What's the best way to make the buttercream extra fluffy?
Chill all your ingredients—especially the heavy whipping cream and mixing bowls—before starting. Use cold butter (cut into cubes) instead of room-temperature, and whip it with the powdered sugar mixture until completely smooth. For extra volume, fold in 1-2 tablespoons of whipped cream at the end. Beat on high speed for 3-4 minutes total for that cloud-like texture.
Can I substitute vanilla extract with vanilla sugar?
Not directly—vanilla sugar is more concentrated, so you'd need to adjust carefully. For the cake, replace 2 tsp vanilla extract with 1 tbsp vanilla sugar mixed into the dry ingredients. For the buttercream, dissolve 1 tbsp vanilla sugar in 1 tsp warm water first, then add to the frosting. The flavor will be slightly different but still delicious!
How do I fix a cake that cracked while baking?
Don't worry—it's common! Let the cake cool completely, then use a serrated knife to carefully trim off the cracked edges. For a quick fix, spread a thin layer of buttercream over the cracks before adding the final frosting. If the crack is deep, fill it with a bit of leftover batter or frosting before decorating. The cake will still taste amazing and look beautiful with creative decorations!