
Desserts
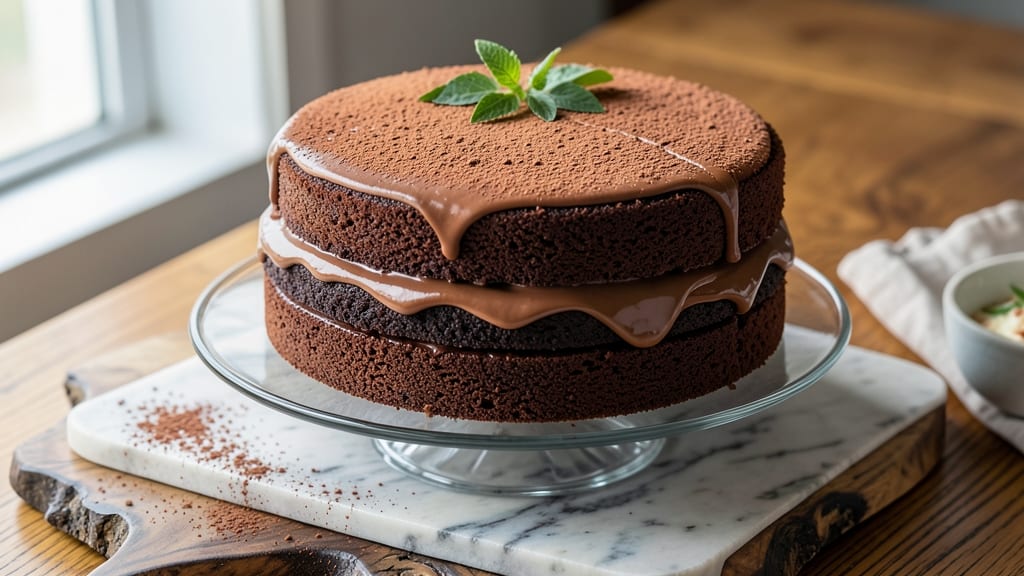
This 8-inch chocolate cake recipe delivers layers of fudgy richness that stay moist for days—no dry crumb in sight. The secret lies in buttermilk and melted butter, which create that signature tender crumb while deepening the cocoa flavor. I’ve baked this cake for everything from birthday celebrations to quiet Sunday afternoons, and it never disappoints.
What sets this recipe apart is its balance: a perfect blend of cocoa powder and melted chocolate for depth without bitterness, and a touch of espresso powder to enhance the chocolate’s complexity.
The layers are baked at a precise temperature to ensure even doneness, while a simple glaze ties everything together with a glossy finish.
By the time you slice into this cake, you’ll find layers that are ultra-moist and richly chocolatey, with a texture that’s neither cakey nor dense. The glaze adds just the right amount of shine and sweetness, making every bite feel like a decadent treat.
This is the kind of cake that impresses without being overly complicated.
Whether you’re serving it at a celebration or enjoying a slice solo, this recipe delivers restaurant-quality results with minimal effort. The layers stay fresh for days, making it perfect for meal prep or special occasions. Let’s get baking!
Ingredients for 8 chocolate cake
The secret to ultra-moist layers lies in these carefully balanced ingredients.
| Ingredient | Amount | Notes |
|---|---|---|
| All-Purpose Flour 🌾 | 2 ½ cups | Sifted for even texture |
| Unsweetened Cocoa Powder 🍫 | ¾ cup | Natural or Dutch-processed |
| Granulated Sugar 🍚 | 2 cups | White or light brown |
| Buttermilk 🥛 | 1 cup | Room temperature preferred |
| Melted Unsalted Butter 🧈 | 1 cup | Cooled to room temp |
| Large Eggs 🥚 | 2 whole | Room temperature |
| Vanilla Extract 🌿 | 2 tsp | Pure vanilla preferred |
| Instant Espresso Powder ☕ | 1 tsp | Enhances chocolate depth |
| Baking Soda 🧂 | ½ tsp | Pure baking soda |
| Salt 🧂 | ½ tsp | Fine sea salt |
| Semisweet Chocolate Chips 🍫 | 1 cup | High-quality brand |
| Powdered Sugar 🍚 | 1 cup | For glaze |
| Heavy Cream 🥛 | ¼ cup | For glaze |
| Milk 🥛 | 1 tbsp | For glaze |
The cocoa powder is non-negotiable here—Hershey's Special Dark or Valrhona deliver that velvety richness. King Arthur flour or Bob's Red Mill all-purpose flour ensures a tender crumb. For the espresso powder, Starbucks or Lavazza instant varieties work perfectly. The buttermilk should be room temperature to blend smoothly, and if you can't find it, substitute 1 cup milk + 1 tbsp vinegar and let it sit for 5 minutes. The melted butter must be cooled to room temp before mixing to prevent steam pockets in the batter.
No buttermilk? Plain yogurt or sour cream works in a pinch—just thin it with milk to reach 1 cup total. Dutch-processed cocoa powder adds richness but slightly less depth than natural, so stick with natural if you want maximum chocolate flavor. For the glaze, Nestlé Toll House chocolate chips melt beautifully, but Ghirardelli squares elevate the flavor. The heavy cream should be cold when whipping with powdered sugar to achieve that glossy finish. If you're short on time, microwave the chocolate chips in 30-second bursts until fully melted for the glaze—no need for a double boiler.
Store the cake layers in an airtight container at room temperature for up to 3 days, or in the fridge for 5 days. The glaze hardens at room temperature, so reheat slices in the microwave for 5-10 seconds if it feels too dry. For make-ahead prep, bake the layers and glaze them the day before—flavor improves overnight. Freeze the fully assembled cake for up to 3 months by wrapping each layer in plastic wrap and placing the whole cake in a freezer bag.
Why You'll Love This Recipe
- Foolproof Mix-In: The cocoa powder and buttermilk do all the heavy lifting—no fancy techniques, just stir, bake, and boom. I’ve made this while chatting on the phone, and it’s still perfect. The melted butter keeps it moist without fussing over eggs or cream.
- Rich Without Guilt: That deep chocolate flavor? Just sugar, cocoa, and butter—no artificial junk. Honestly, the first time I sliced it, my kids asked if I’d added chocolate chips. (Spoiler: I didn’t need to.) It’s the kind of cake that tastes like a treat but won’t wreck your grocery budget.
- Party or PJs: Slice it for a birthday cake, stack it for a date night dessert, or grab a fork straight from the pan when you’re too tired to care. Between us, I’ve served this at brunch, as a midnight snack, and even as a “healthy” breakfast when I needed to lie to myself.
- Leftovers That Last: This cake stays moist for days—no dry crumbs, no sad edges. I’ll be real: I’ve reheated slices in the microwave and pretended it was fresh. And because it’s budget-friendly (thanks, pantry staples), you can bake a whole sheet and not feel bad about it. Win-win.
Step-by-step instructions for ultra-moist chocolate cake
Here's how to achieve perfectly dense, fudgy layers with that signature cocoa richness.
Preheat and Prepare Pans
Preheat your oven to 350°F and position racks in the upper and lower thirds. Generously grease two 8-inch round cake pans with melted butter, then line the bottoms with parchment circles. Brush the sides with additional butter to prevent sticking—this is crucial for easy release after baking.
I like to use room-temperature butter for greasing because it creates a smoother barrier than cold butter. The parchment prevents the cake from drying out against the metal, which is especially important for this ultra-moist recipe. Tap the pans gently on the counter to ensure the parchment sticks securely before adding batter.
Mix Dry Ingredients
In a medium bowl, whisk together the 2.5 cups all-purpose flour, 0.75 cup unsweetened cocoa powder, 0.5 tsp baking soda, and 0.5 tsp salt. Sift the mixture through a fine-mesh sieve directly into the bowl to aerate it—this creates a lighter texture in the final cake. Use a rubber spatula to break up any lumps, ensuring an even distribution of cocoa.
The cocoa powder should be completely incorporated with no visible streaks. I always sift the dry ingredients first because it prevents dense pockets in the cake. This step is particularly important for maintaining that signature moist quality throughout each slice.
Combine Wet Ingredients
In a separate large bowl, beat the 1 cup melted unsalted butter (cooled to room temperature) and 2 cups granulated sugar on medium speed with an electric mixer until light and fluffy—about 3-4 minutes. The mixture should nearly double in volume and become pale in color. This creaming process incorporates air that will create lift in the cake.
Add the 2 whole large eggs one at a time, beating well after each addition. Mix in the 1 cup buttermilk, 2 tsp vanilla extract, and 1 tsp instant espresso powder. The espresso powder enhances the chocolate flavor without adding bitterness. Let the mixture sit for 1 minute—this allows the flour to fully hydrate when added next.
Fold and Bake
Gradually add the dry ingredients to the wet mixture, mixing on low speed just until combined. Avoid overmixing—stop as soon as you see no more flour streaks. Fold in the 1 cup semisweet chocolate chips by hand using a spatula. Divide the batter evenly between the prepared pans, tapping gently to remove air bubbles.
Bake for 30-35 minutes or until a toothpick inserted in the center comes out with moist crumbs but no wet batter. Rotate the pans halfway through baking for even browning. The cake should be springy to the touch and pull away slightly from the sides of the pan. Let cool in pans for 10 minutes before transferring to a wire rack to cool completely.
Prepare Chocolate Glaze
While the cakes cool, combine the 1 cup powdered sugar, 0.25 cup heavy cream, and 1 tbsp milk in a small bowl. Whisk until smooth—this should create a thick, pourable glaze that coats the back of a spoon. The glaze should be glossy but not runny; add more powdered sugar if needed for proper consistency.
Once the cakes are completely cool, place one layer on a serving plate. Spread about ⅓ of the glaze over the top, then add the second layer. Pour the remaining glaze over the top and sides, letting it drip slightly down the edges. Use a spatula to smooth any uneven areas. Serve immediately for the most decadent experience.
Pro Tips For Making 8 Chocolate Cake
- Sift the Cocoa: I learned this the hard way—lumpy cocoa powder makes a dense, uneven cake. Use a fine-mesh sieve to sift the cocoa directly into your dry ingredients before mixing. No sieve? A clean kitchen towel works in a pinch, but it’s messier than it’s worth.
- Melt Butter Slowly: Skip the microwave for melted butter—it burns easily and can turn your cake greasy. Instead, melt it in a bowl set over simmering water (double boiler) or in 20-second bursts in the microwave, stirring between each. Cool it to room temp before adding to the batter, or your cake will cook unevenly.
- Buttermilk Must Sit: Don’t grab that buttermilk straight from the fridge. Let it warm up to room temp for 10 minutes first—cold buttermilk curdles when mixed with warm melted butter, and your batter will look weird. If you’re in a rush, pour it into a measuring cup and let it sit while you prep the rest.
- Bake Until Springy: Your cake’s done when the edges pull away from the pan and a toothpick comes out with a few moist crumbs, not wet batter. Overbaking is easy—set a timer for 2 minutes before checking, then test. If it’s still jiggly, give it 5 more minutes. Better to underbake slightly than dry it out.
Best sauces and condiments for these flavors
Classic Chocolate Ganache
This silky ganache elevates your cake with its velvety texture and deep cocoa flavor. Melt ½ cup heavy cream and 8 oz high-quality dark chocolate (I love Ghirardelli 60% or 70% bars) together in a double boiler or microwave.
Stir until smooth, then cool to 85°F before spreading over the cake layers. The ganache should be thick enough to hold its shape but still drizzle slightly. 🍫
Creamy Salted Caramel Drizzle
For a sweet-salty contrast, make a simple caramel drizzle by simmering ½ cup granulated sugar in a saucepan until amber-colored. Whisk in ¼ cup heavy cream and 2 tbsp unsalted butter, then finish with a pinch of flaky sea salt.
Let cool slightly before drizzling over the glaze. This adds a sophisticated touch that balances the richness. 🌟
Whipped Cream Frosting
Lighten up the cake with a classic whipped cream frosting. Whip 1 cup heavy cream to stiff peaks, then fold in 2 tbsp powdered sugar and 1 tsp vanilla extract.
Pipe or spread over the cake for a cloud-like finish. For extra flair, dust with cocoa powder or crushed chocolate sprinkles before serving. ✨
Peanut Butter Swirl
Add a nostalgic twist by mixing ½ cup creamy peanut butter into the cake batter before dividing between pans. After baking, spread a thin layer of peanut butter between the cake layers and on top. This creates beautiful swirls when sliced, pairing perfectly with the chocolate. 🥜
Espresso Chocolate Glaze
Enhance the chocolate flavor further by infusing the glaze with espresso. Whisk 1 cup powdered sugar, ¼ cup heavy cream, and 1 tbsp instant espresso powder until smooth.
The espresso deepens the chocolate notes without adding bitterness, creating a sophisticated finish. This is my go-to for a more complex flavor profile. ☕
Nutrition facts
Frequently asked questions
Can I make this cake in a 9-inch pan instead?
Yes, but you'll need to adjust the baking time. For a 9-inch pan, reduce the batter by about 15% (use ~2 cups instead of 2.5 cups flour) and bake for 25-30 minutes at 350°F. The cake will be slightly thinner but still moist. Always check with a toothpick for doneness!
Why does my chocolate cake turn out dry?
Overbaking or overmixing are the most common culprits. This recipe's secret is the buttermilk and melted butter, which keep it moist. Bake until a toothpick comes out with moist crumbs (not wet batter), and mix just until combined. For extra moisture, brush warm layers with simple syrup after baking.
Can I substitute Dutch-processed cocoa powder?
Dutch-processed cocoa adds richness but slightly less depth than natural cocoa. Use the same amount (0.75 cup) and reduce baking soda to ¼ tsp since Dutch-processed cocoa is alkaline. For maximum chocolate flavor, stick with natural cocoa powder like Hershey's Special Dark.
How do I store leftover cake?
Keep layers in an airtight container at room temperature for up to 3 days or refrigerate for 5 days. For longer storage, freeze the fully assembled cake (wrapped tightly) for up to 3 months. Reheat slices in the microwave for 5-10 seconds to restore moisture if needed.
What's the best way to level the cake layers?
Use a serrated knife or cake leveler for clean cuts. Chill the cake for 15-20 minutes in the fridge first—this makes slicing easier. Dip the knife in hot water between cuts to prevent crumbs. For perfectly even layers, mark the height with a toothpick before cutting.