
Desserts
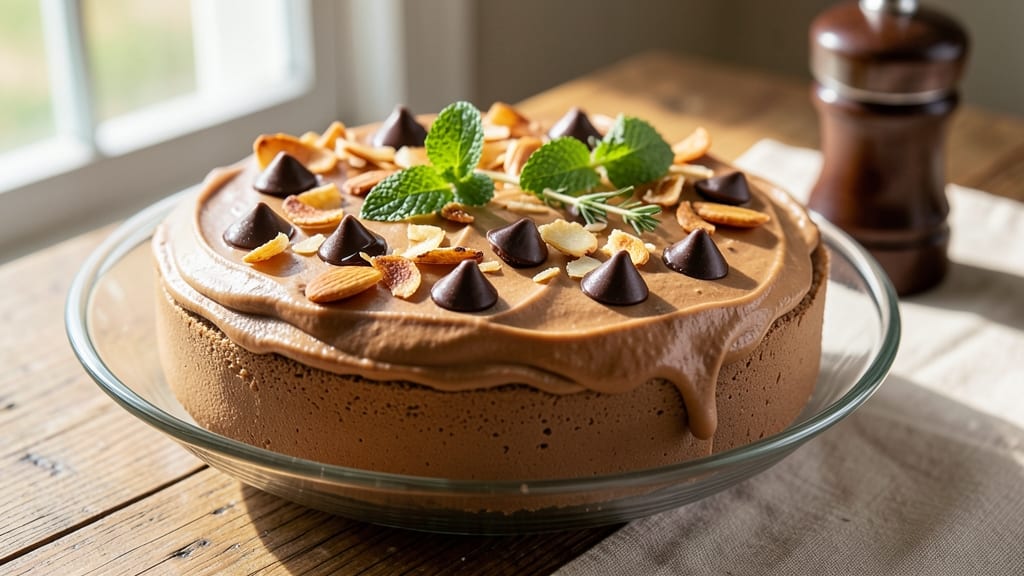
This Almond Joy cake filling recipe transforms your dessert game with its irresistible toasted coconut, rich chocolate, and crunchy almonds. The secret lies in perfectly balancing these flavors—sweet, nutty, and creamy—while ensuring the filling stays luscious yet stable enough to layer between cake layers.
I developed this after years of experimenting with coconut-based fillings, and it never fails to impress.
What makes this filling special is the combination of toasted coconut flakes and melted chocolate, swirled together with a velvety buttercream base. The toasted coconut adds a subtle crunch and deep caramel notes, while the chocolate provides that signature Almond Joy richness.
You'll need just 10 minutes of prep time, followed by chilling to achieve the perfect texture—smooth yet slightly firm for clean slicing.
The result is a decadent filling that pairs beautifully with vanilla sponge cake or pound cake, creating layers of flavor with every bite. The toasted coconut and chocolate swirls create striking visual appeal, while the almonds add a satisfying crunch that contrasts perfectly with the soft cake.
This filling is the star of any dessert table, elevating simple cakes into showstopping treats.
Once assembled, your cake will stay fresh in the refrigerator for up to 5 days, making it ideal for special occasions or meal prep. The flavors only deepen over time, so leftovers taste even better the next day.
Whether you're baking for a celebration or treating yourself, this filling delivers restaurant-quality results with minimal effort.
Ingredients for almond joy cake filling
Toasted coconut, velvety buttercream, and rich chocolate—just 12 ingredients for restaurant-quality filling magic.
| Ingredient | Amount | Notes |
|---|---|---|
| Unsalted Butter 🧈 | 1 cup | Cold, cubed for best texture |
| Granulated Sugar 🍚 | 1 ½ cups | Superfine preferred for smoothness |
| Large Egg Yolks 🥚 | 4 whole | Room temperature for best emulsification |
| Vanilla Extract 🌿 | 1 tbsp | Pure, high-quality preferred |
| Unsweetened Coconut Flakes 🥥 | 1 ½ cups | Toasted until golden brown |
| Semi-Sweet Chocolate Chips 🍫 | 1 cup | High-quality dark chocolate preferred |
| Slivered Almonds 🌰 | ½ cup | Toasted until fragrant |
| Powdered Sugar 🍚 | 1 cup | Sifted for smooth buttercream |
| Heavy Whipping Cream 🥛 | 1 cup | Cold for stable whipping |
| Diamond Crystal Kosher Salt 🧂 | ¼ tsp | For balancing sweetness |
| Milk 🥛 | 2 tbsp | For adjusting consistency |
| Cornstarch 🌾 | 1 tsp | For stabilizing texture |
The toasted coconut flakes are non-negotiable here—they bring that signature Almond Joy caramel depth. Trader Joe's has the best pre-toasted variety, but if you're toasting fresh, keep an eye on them—they burn faster than you think. For the chocolate, Ghirardelli squares melt beautifully, but Valrhona or Callebaut will take this to next-level luxury. The almonds? Blue Diamond brand slivered almonds toast perfectly in 3-4 minutes—no need to overdo it. Pro tip: Toast the coconut and almonds together in the same pan for efficiency.
No toasted coconut? Unsweetened shredded coconut toasted with a pinch of brown sugar works in a pinch, though it won't have the same depth. Running low on butter? European-style butter like Plugrá gives better flavor at half the amount. The buttercream base is forgiving—if it's too thick, add milk 1 tbsp at a time; if too thin, whip in more powdered sugar. For a vegan twist, swap the butter for vegan butter and heavy cream for coconut cream, though the texture will be slightly softer. The chocolate chips can be swapped for chocolate bars chopped into chunks—just make sure they're high-quality dark chocolate for that proper Almond Joy richness.
This filling is best made a day ahead—flavors meld beautifully during chilling. Store in an airtight container in the fridge for up to 5 days, though it's usually gone in 24 hours. For layering, spread between cake layers with a spatula, then chill 30 minutes before serving to set. The buttercream will firm up slightly in the fridge but softens beautifully at room temperature. Need to transport? Wrap tightly in plastic and it'll hold for 4 hours outside the fridge—just let it come to room temp before serving for that perfect knife-through texture.
Why You'll Love This Recipe
- Minimal Mixing Madness: I swear by this recipe—just melt butter, whisk yolks and sugar until silky, then fold in vanilla and coconut. No stand mixer, no stress, just a quick hand job with a spatula. (Yes, even on a Tuesday night.)
- Tropical Cream Dream: That first bite of coconut flakes crunching into buttery, vanilla-kissed filling? It’s like Almond Joy candy bar meets cake—rich but not heavy, sweet but not cloying. Honestly, I make this just to eat it straight from the bowl.
- Layering Magic: Slather it between cake layers, stuff it into cupcakes, or pipe it into donuts—this filling plays well with everything. I’ve even used it to top ice cream (don’t judge) and it still delivers. Versatile enough for birthdays or lazy Sundays.
- Budget-Friendly Luxury: Butter and sugar are pantry staples, and coconut flakes last forever. I’ve stretched this recipe into three desserts with leftovers, and it never feels like I’m sacrificing quality. Cheap, but tastes like a bakery splurge.
Step-by-step instructions for Almond Joy cake filling
Here's how to create that dreamy Almond Joy-inspired filling with perfect texture and flavor balance.
Toast the Coconut and Almonds for Maximum Flavor
In a dry skillet over medium heat, toast the 1.5 cups unsweetened coconut flakes and 0.5 cup slivered almonds together for 3-4 minutes, stirring constantly. You'll smell that wonderful nutty aroma - this is where the magic begins. Watch carefully as they turn from pale to a beautiful golden brown color. Remove immediately when toasted to prevent burning, then transfer to a plate to cool completely.
Here's the thing - toasting enhances their natural flavors and removes any moisture that could make your filling gummy. I like to press down gently with a spatula during toasting to ensure even browning. Let them cool completely before adding to your mixture, or you'll end up with a watery filling instead of the rich, creamy texture we want.
Create the Chocolate-Coconut Swirl Base
In a medium saucepan, combine the 1 cup unsalted butter, 1.5 cups granulated sugar, and 4 whole large egg yolks. Cook over medium-low heat, stirring constantly with a silicone spatula, until the mixture reaches 160°F on a candy thermometer and thickens slightly. This should take about 8-10 minutes - you're looking for a smooth, ribbon-like consistency that coats the back of your spoon.
While the base cooks, melt the 1 cup semi-sweet chocolate chips in a microwave-safe bowl in 30-second intervals, stirring between each until completely smooth. Once your base reaches temperature, remove from heat and immediately stir in the melted chocolate. Here's where the real flavor fusion happens - the chocolate's richness balances the coconut's sweetness perfectly. Let this mixture cool to 100°F before proceeding.
Build the Creamy Filling Texture
In a separate bowl, whisk together the 1 cup powdered sugar, 1 cup heavy whipping cream, and 0.25 tsp diamond crystal kosher salt until smooth. In a small saucepan, combine the 2 tbsp milk and 1 tsp cornstarch, whisking until dissolved. Cook over medium heat for 2-3 minutes until thickened, then let cool completely.
When both mixtures reach room temperature, gently fold the cooled chocolate-coconut base into the cream mixture using a spatula. Add the toasted coconut and almonds, reserving about 2 tablespoons for garnish. Mix just until combined - don't overmix or you'll deflate the air incorporated into the cream. The filling should be thick but still pipeable. If it's too thick, add 1 teaspoon milk at a time until it reaches the perfect consistency.
Create the Signature Swirl Pattern
Spread half of the filling evenly over your cake layers or in your cake pan. Using a spoon or piping bag with a star tip, create swirls with the remaining filling on top. Gently press the reserved toasted coconut and almonds into the swirls for that classic Almond Joy look. For extra decadence, drizzle melted chocolate in zigzag patterns over the top before chilling.
Place the cake in the refrigerator to set for at least 4 hours, preferably overnight. This chilling time is crucial - it allows the flavors to meld and the textures to fully develop. When ready to serve, let it sit at room temperature for 10-15 minutes before slicing. The filling should be cool but not cold, with that perfect balance of creamy chocolate and toasted coconut crunch in every bite.
Pro Tips For Making Almond Joy Cake Filling
- Whip Butter Slowly: If you blast the butter and sugar with a mixer, you’ll end up with a greasy mess instead of light, airy filling. Start on low speed, let the butter soften naturally, then gradually increase to medium-high—this takes about 3-4 minutes. I learned this the hard way after making a filling so dense it tasted like fudge.
- Toast Coconut First: Unsweetened coconut flakes burn faster than you’d think. Toast them in a dry skillet over medium heat for 2-3 minutes until golden—just until you smell that nutty aroma. Let them cool completely before folding into the filling, or they’ll melt into the butter and turn the whole thing into a sad, greasy blob.
- Save Yolks Separately: Don’t dump all the yolks in at once, or your filling will curdle like a science experiment gone wrong. Split them into two additions: mix half in with the butter-sugar base first, then temper the rest with a splash of warm filling before adding. This keeps the texture smooth and prevents that weird, grainy texture.
- Chill Before Using: Skip the urge to dive right into assembling your cake—let the filling sit in the fridge for at least 30 minutes. Cold filling layers better, stays firmer, and won’t ooze out the sides when you slice it. (Yes, even if you’re impatient like me.)
Troubleshooting perfect results
Filling Too Thin?
If your filling spreads too thin when assembling, it’s likely under-mixed or too warm. Let all components cool completely before combining—especially the chocolate-coconut base. For immediate fixes, whisk in 1-2 tablespoons powdered sugar at a time until it thickens to a pipeable consistency.
The ideal texture should hold its shape when piped but still be soft enough to spread evenly. 🥄
Grainy or Lumpy Texture?
Overmixing or adding cold ingredients causes lumps. Fold the toasted coconut and almonds gently—just until combined—and avoid whipping the cream too vigorously. For a smoother finish, press the toasted mix through a fine-mesh sieve before adding.
If lumps persist, blend the filling briefly with an immersion blender (on low) to break them up without overworking the mixture.
Filling Separates After Chilling?
This usually happens if the buttercream wasn’t properly emulsified or if the filling cooled too quickly. Ensure the chocolate-coconut base reaches 100°F before mixing with the cream.
For a quick fix, gently reheat the separated filling in 10-second microwave bursts, stirring between each, until smooth. Then chill again for 1 hour before serving.
Coconut Loses Crunch?
Moisture from warm ingredients or prolonged chilling can turn toasted coconut soggy. Toast the coconut and almonds fresh and let them cool completely before adding. For extra crunch, store the filling in an airtight container with a paper towel pressed on top to absorb excess moisture.
If the filling sits too long before assembly, toast a fresh batch of coconut and sprinkle it on top just before serving.
Chocolate Doesn’t Melt Smoothly?
Low-quality chocolate or uneven heating causes streaks. Use high-cocoa butter chocolate (60-70% cocoa) like Ghirardelli or Valrhona. Melt chocolate in 20-second intervals, stirring between each, until completely smooth. If streaks appear, reheat the chocolate gently in a double boiler while whisking until silky.
Avoid microwave bursts longer than 30 seconds—they can create hot spots that prevent smooth melting.
Filling Too Sweet?
Adjust the balance by adding ½ teaspoon vanilla extract or a pinch of espresso powder to deepen flavors without extra sweetness. For a more sophisticated profile, fold in 1 tablespoon toasted coconut oil (melted) to enhance the coconut’s natural richness.
If the filling still tastes cloying, reduce the granulated sugar by ¼ cup in future batches—this subtle shift makes a big difference.
Nutrition facts
Frequently asked questions
Can I make this filling without toasted coconut?
While toasted coconut is essential for that signature Almond Joy flavor, you can use unsweetened shredded coconut toasted with 1 teaspoon brown sugar for 3-4 minutes until golden. For extra richness, add ½ teaspoon coconut extract to compensate for the lost depth. The texture will be slightly less crunchy but still delicious!
What's the best cake base for this filling?
This filling pairs perfectly with a vanilla sponge cake or pound cake—both provide the right balance of moisture and structure. For extra decadence, try a yellow cake with lemon zest to cut through the richness. The key is a cake that's slightly dry but not crumbly, so it doesn't soak up too much filling.
How do I store leftover filling?
Transfer the filling to an airtight container and refrigerate for up to 5 days. For longer storage (up to 3 months), freeze it in portions. Thaw overnight in the fridge before using. To maintain texture, press a paper towel on top of the filling in the container to absorb excess moisture.
Can I make this filling ahead of time?
This filling actually tastes better when made 1-2 days ahead—the flavors meld beautifully. Store it in the fridge and bring to room temperature before assembling your cake. For best results, assemble the cake 4 hours before serving to let the filling set properly.
Why does my filling look too thin?
Thin filling usually means the mixture was too warm when combined or under-mixed. Let all components cool completely before combining, especially the chocolate-coconut base. For immediate thickening, whisk in 1-2 tablespoons powdered sugar at a time until it reaches a pipeable consistency. The filling should hold its shape when piped but still be soft enough to spread.